LEARN TO ANIMATE TUTORIAL : WHAT YOU NEED
These are the tools of the trade. How much you spend on your tools will depend on how serious you are about art and animation.

Apple iPad Pro ($799+) with Apple Pencil 2nd Generation ($129)

Apple MacBook Pro ($1,299)

Adobe Creative Cloud ($59/mo)

BEFORE YOU START
If you are unclear what the difference between a VECTOR and RASTER graphic you should stop and watch this video before you start.
While you can animate using raster graphics you will not achieve sharp clean animation.
PART 1 : DIGITAL ILLUSTRATION
ADOBE FRESCO
For illustrating on an Apple iPad Pro using the Apple Pencil 2nd Generation
Illustrating on the iPad is the fastest and most enjoyable way to digitally illustrate.
Pen tablets are just as fast but they tether you to your MacBook.
DOWNLOAD FROM THE APPLE APP STORE

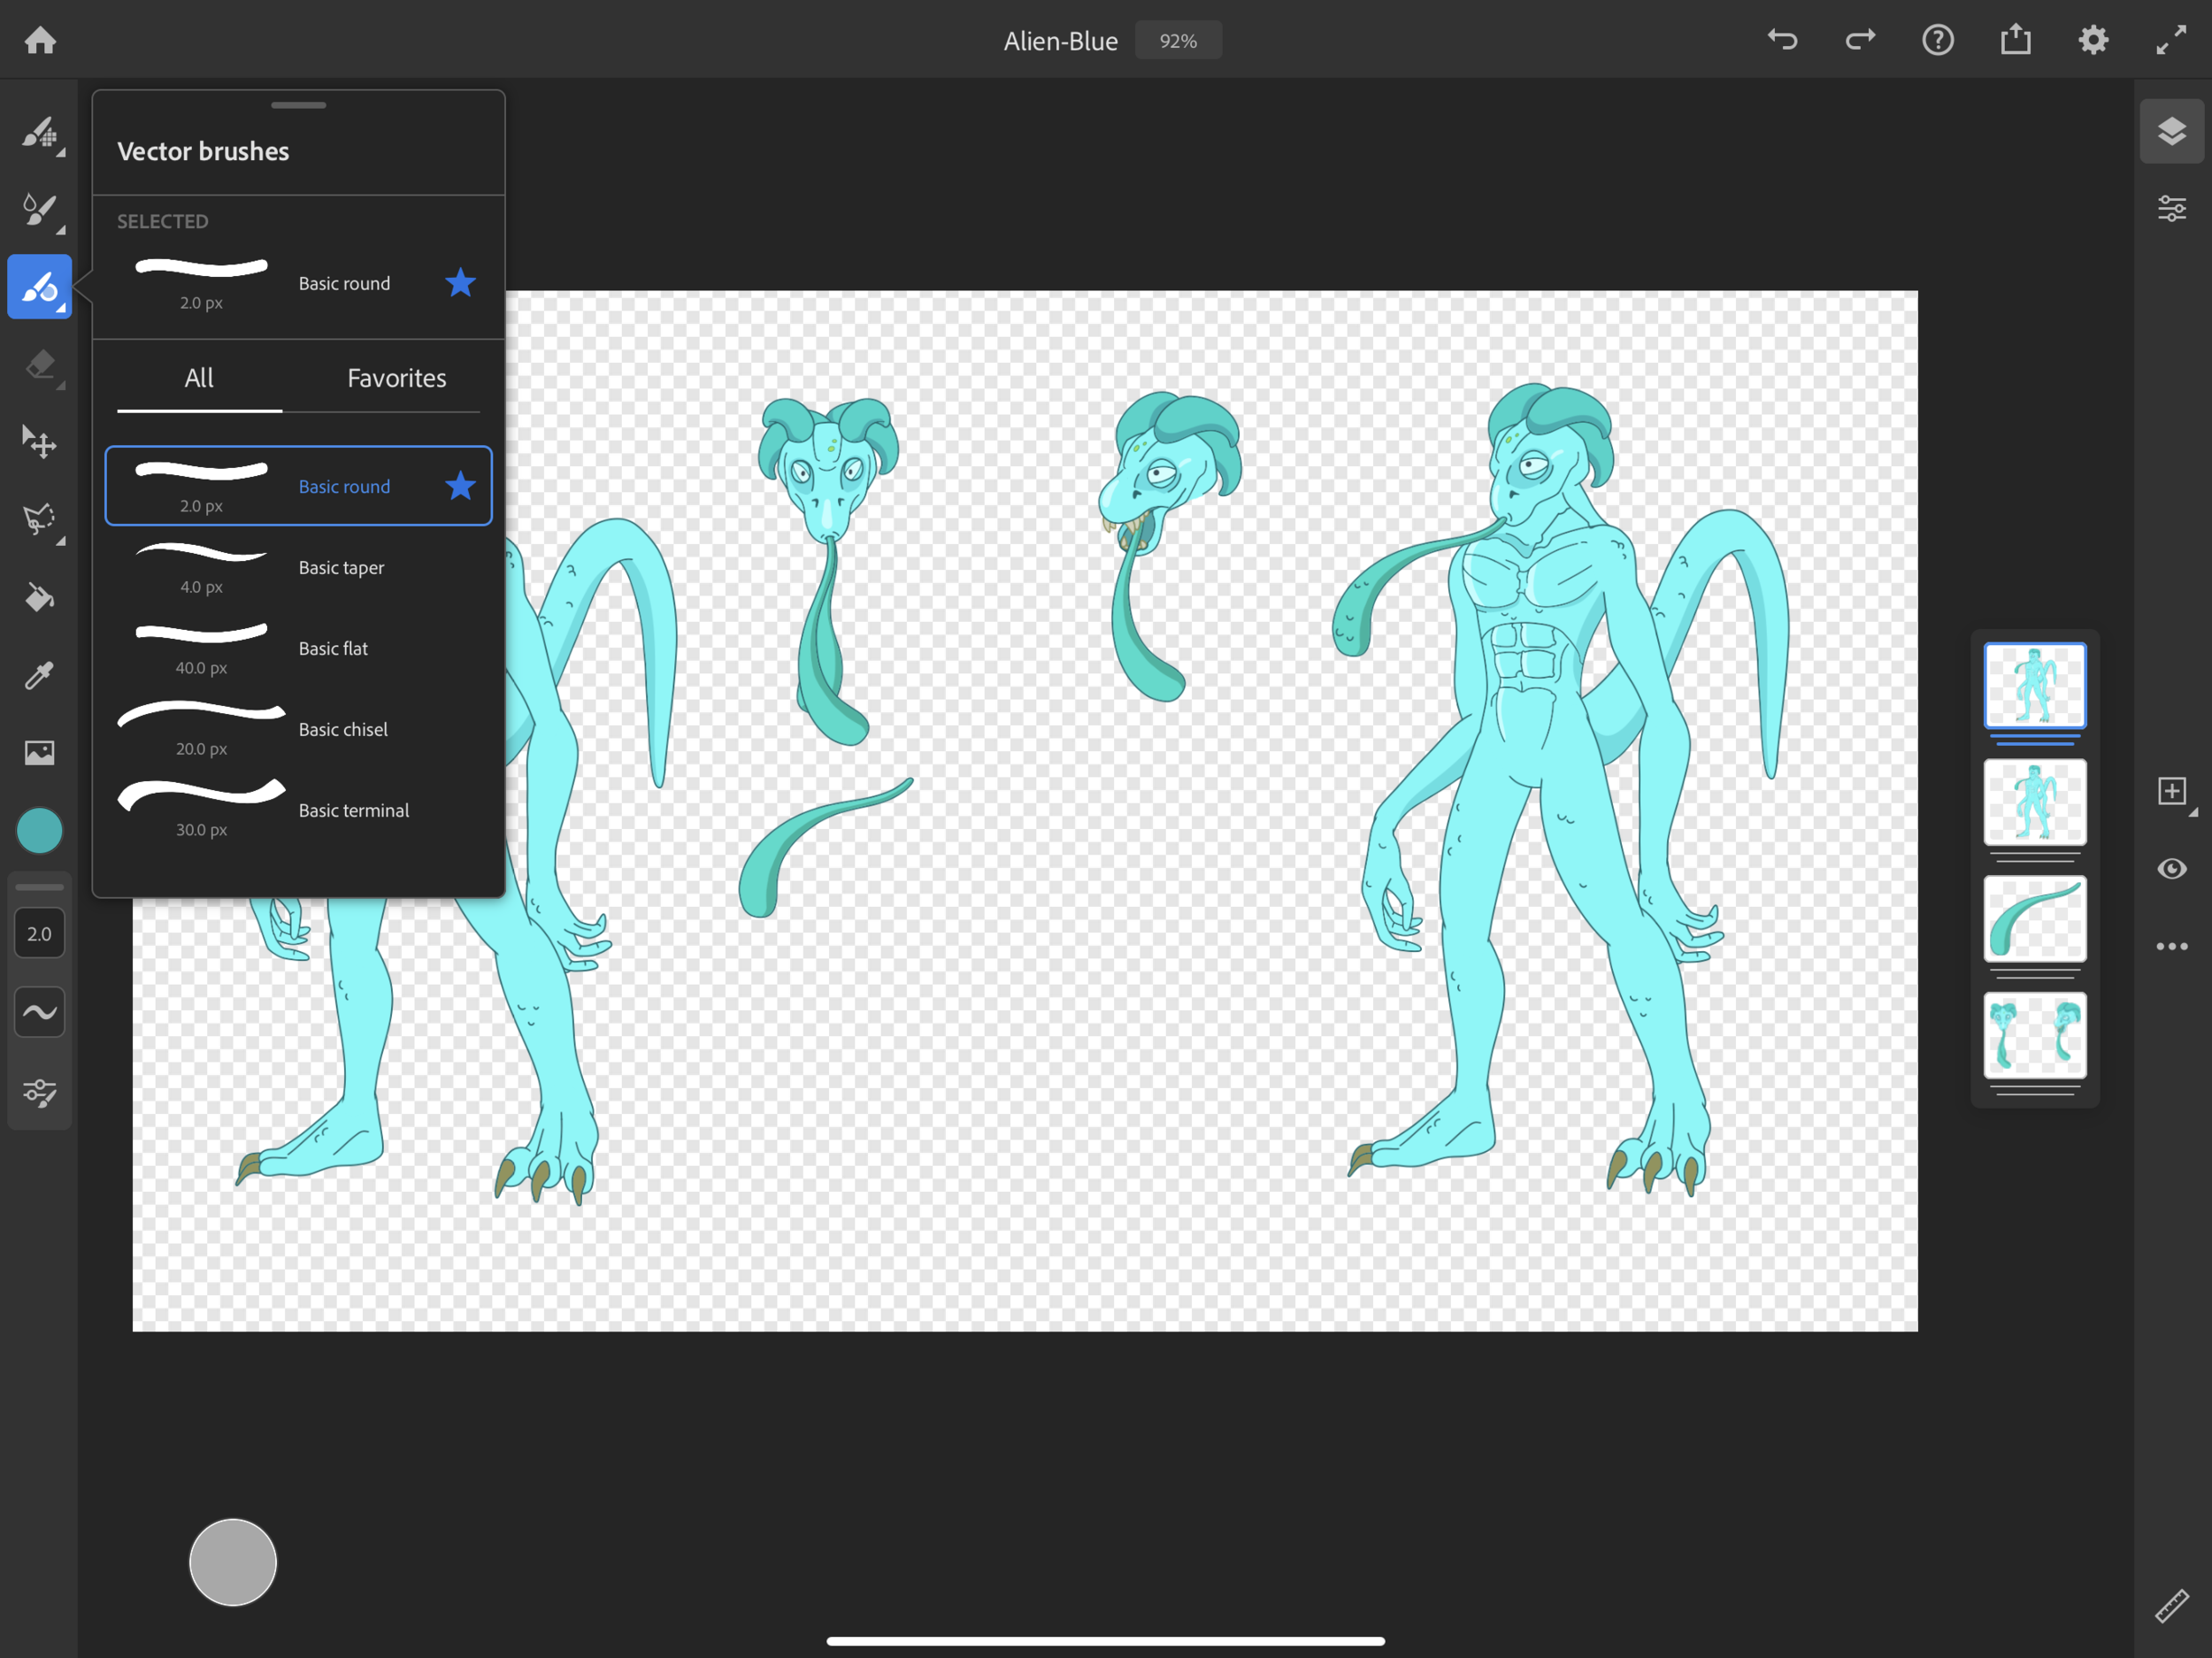
Ensure you are illustrating with the VECTOR BRUSH do not use the texture brushes or you won’t be able to keep your project in layers when you export it to Adobe Illustrator
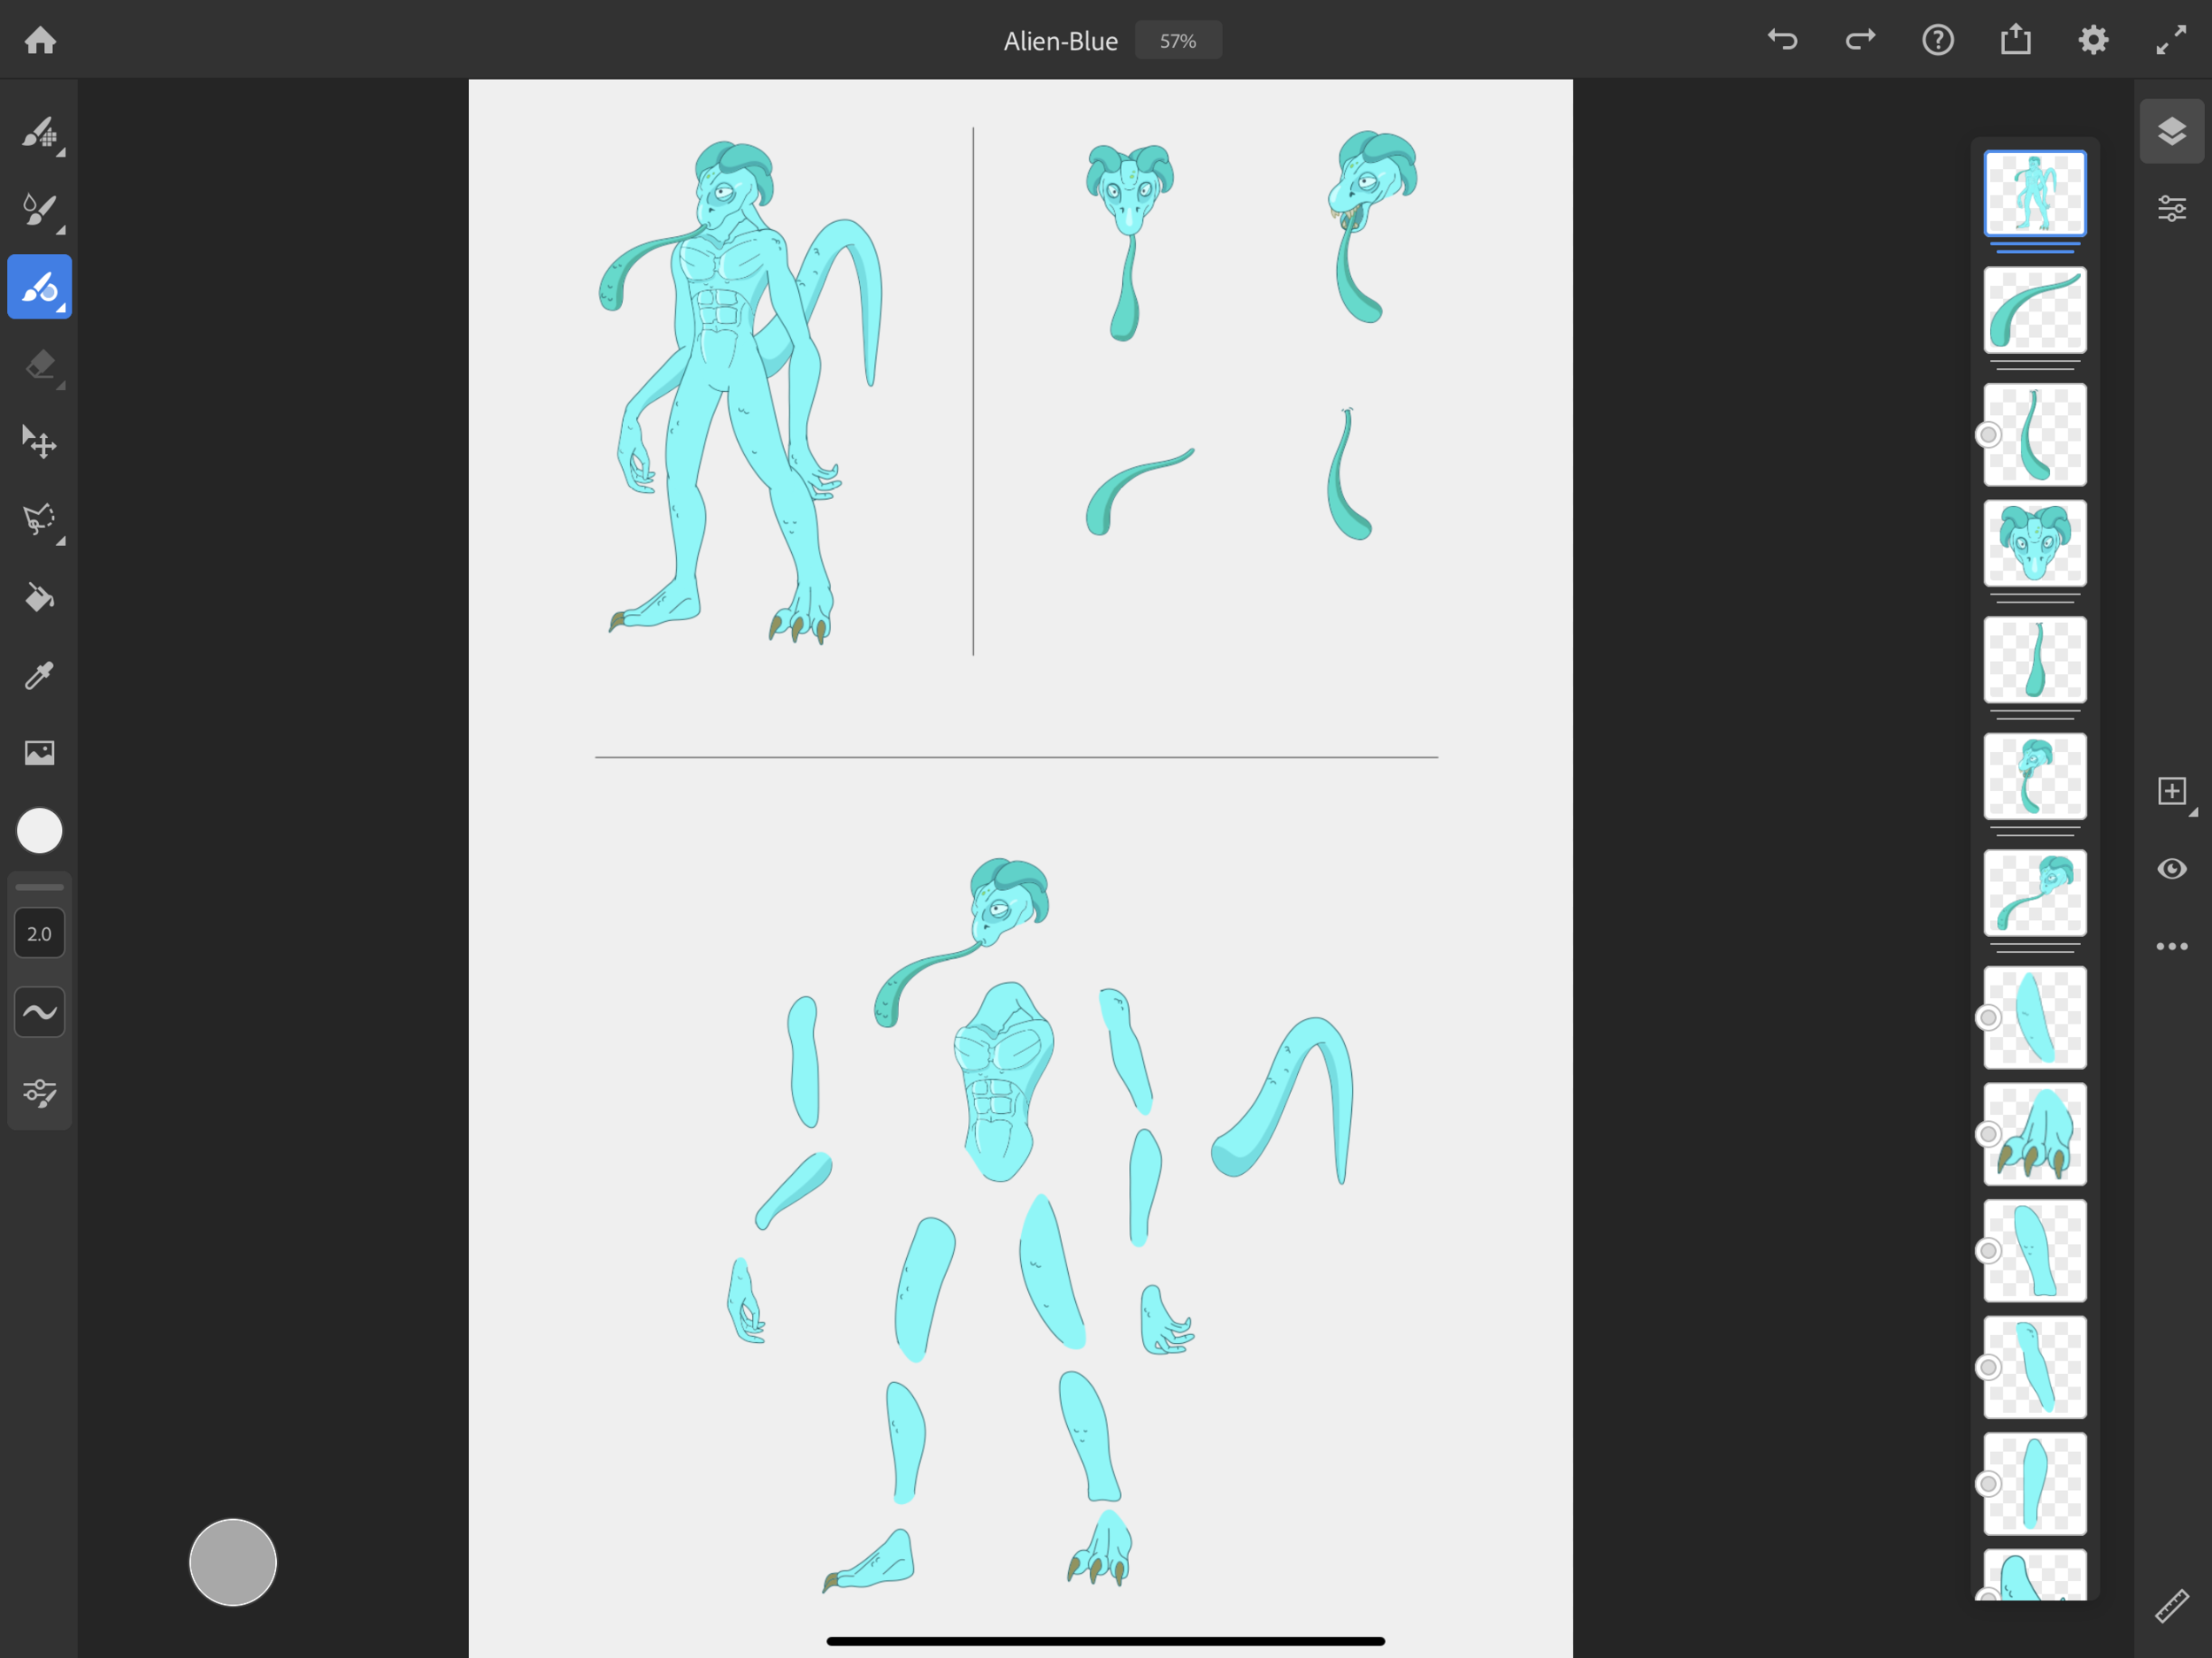
Keep all of your elements separated on different layers
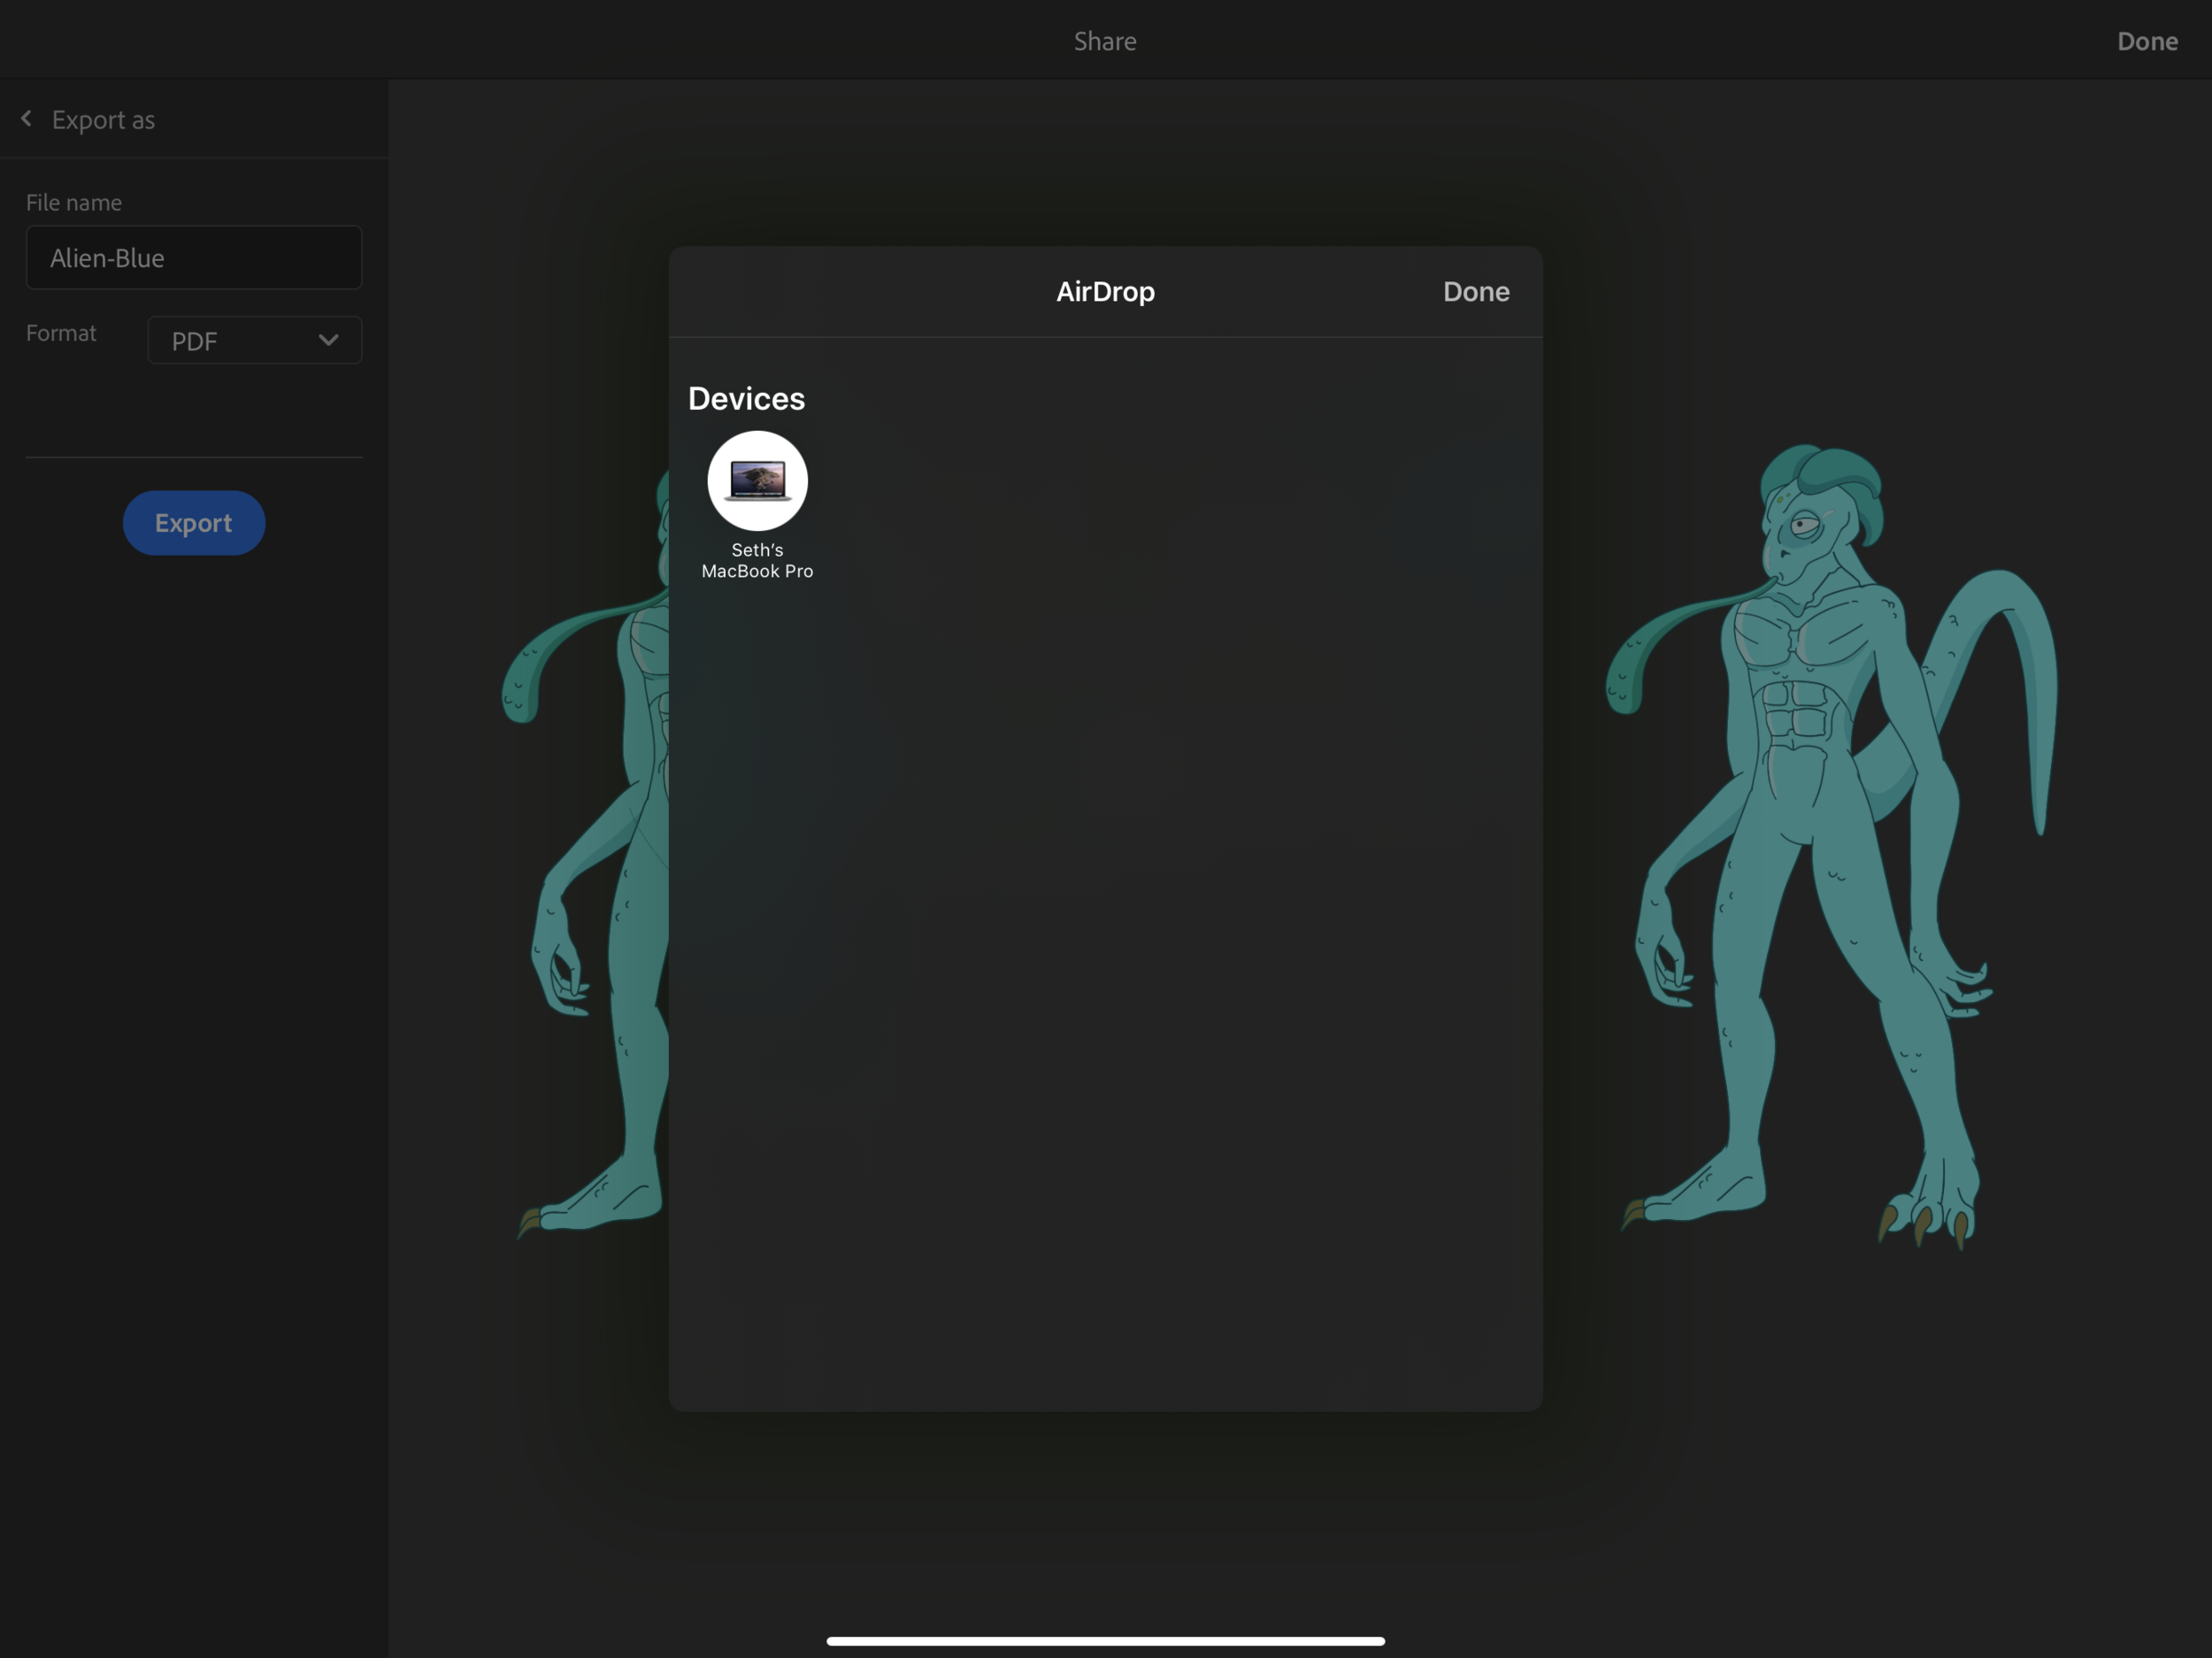
When finished, click the export button at the top right corner and AirDrop your file as a PDF to your MacBook
ADOBE ILLUSTRATOR
For illustrating on a MacBook using a mouse or tablet pen.
Using Adobe Illustrator to open your PDF files allows you to easily copy and paste them into Adobe Animate
If you don’t have an iPad you can use Adobe Illustrator on your MacBook to illustrate with.

STEP 1 : OPEN YOUR PDF IN ADOBE ILLUSTRATOR

Open your PDF file in Adobe Illustrator and select all of the body parts then open up Adobe Animate and simply copy and paste.
STEP 2 : COPY AND PASTE INTO ADOBE ANIMATE

Your graphics should past in just the way they were in Adobe Illustrator
Copy = (Command+C) / Paste = (Command+V)
PART 2 : ANIMATION
ADOBE ANIMATE
For animating images created in Adobe Fresco or Adobe Illustrator
Adobe Animate uses a frame-by-frame and motion “tween” for moving images.
You can also use the Bone Tool for movement of arms and legs.
See more about using the Bone Tool here

STEP 1 : CREATE A FULL BODY SYMBOL

STEP 1 : DRAG THE CURSOR OVER YOUR ENTIRE IMAGE THEN RIGHT CLICK AND CONVERT TO SYMBOL.
This encapsulates everything into one moveable image

Ensure you are giving names to all of your symbols and select GRAPHIC as the TYPE
STEP 2 : SEPARATE LAYERS

STEP 2 : CREATE A SEPARATE LAYER FOR EACH BODY PART
After you create a symbol, double click on it and you will enter that symbols timeline.
You should see (Scene 1 > Blue-Alien-Full-Body) just above your art board.
Giving each part it’s own layer allows you to animate each part independently.
STEP 3 : BONE TOOL (Optional)

You can move the anchor point of each body part then attach them using the Bone Tool.
This might be a little advanced right now so if you can’t get this to work, don’t worry.
STEP 4 : KEY FRAMING
In basic terms “Animation” is really just making small changes to a graphic’s position frame-by-frame. Inserting a KEYFRAME into your timeline allows you to change the graphic’s position and orientation from the previous KEYFRAME.
In this timeline the head stays the same for the first 3 frames. A keyframe is place in frame 4 and the head is moved and again in frame 11.
Green colored layers are using the Bone Tool to “tween” between keyframes. Purple colored layers are using the “basic tween” to move a single graphic.

STEP 5 : EXPORT YOUR ANIMATION

Go to FILE > EXPORT VIDEO/MEDIA

Set FORMAT to QUICKTIME and PRESET to Default (Animate)
PART 3 : ASSEMBLY
ADOBE PREMIERE
For editing your final animation clips, sound design, and digital distribution.
Adobe Premier uses a simple TIMELINE similar to that in Adobe Animate. This allows you to layer on background and foreground graphics and add sounds and music.

STEP 1 : ASSEMBLE YOUR VIDEO ASSETS INTO THE TIMELINE

Here we have 4 video layers, we duplicated the Alien animation, added foreground and background, then added sound effects and ambient wind noise
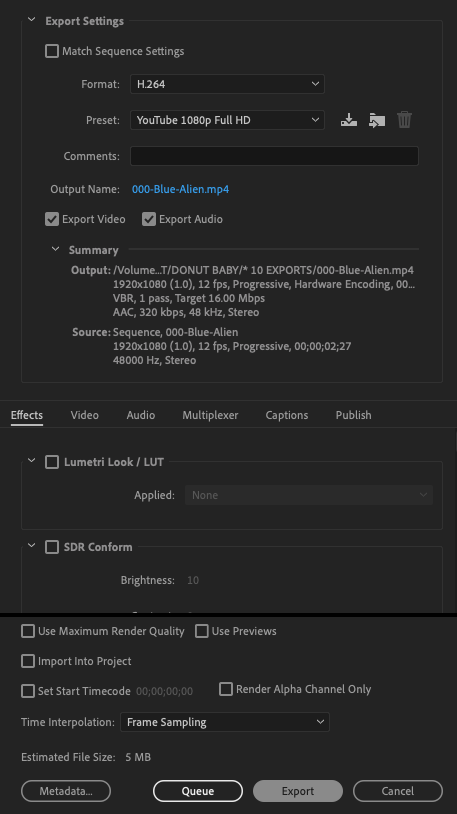
STEP 2 : EXPORT YOUR FINAL VIDEO
NOW IT’S TIME TO EXPORT FROM PREMIERE AND UPLOAD TO YOUTUBE, INSTAGRAM, ETC.
Go to FILE > EXPORT > MEDIA
These are the settings for exporting a YouTube 1080p compressed video